리덕스는 가장 많이 사용하는 리액트 상태 관리 라이브러리이다. 리덕스를 사용하면 컴포넌트의 상태 업데이트 관련 로직을 다른 파일로부터 분리시켜서 더욱 효유적으로 관리할 수 있다.
리덕스 라이브러리를 어떻게 사용하는지 예제를 통해 살펴보고자 한다.
Redux
우선 Redux는 React.js에서 많이 사용하는 상태관리 라이브러리 이지만, 꼭 React.js에서만 동작하는것은 아니다. Vue.js, angular-redux, ember-redux 등에서도 사용이 가능하다.
Vue에서는 리덕스와 유사한 Vuex를 주로 사용한다. 리덕스는 바닐라 자바스크립트와 함께 사용할 수 있다.
(바닐라 자바스크립트란, 라이브러리나 프레임워크 없이 순수 자바스크립트를 사용하는것을 의미한다)
React.js에서는 데이터의 흐름이 단일방향이기 때문에,
하위 컴포넌트에서 상위컴포넌트로의 데이터통신을 할 때 직접 교류하는 방법이 있긴 하지만 React에서는 권하지 않는 방법이다.
이를 해결하기 위하여 Redux가 생겨났고, Redux를 이해하기 위해서는 디자인 패턴 종류중 하나인 Flux의 개념을 이해할 필요가 있다.
Flux
어플리케이션을 개발하다보면 MVC, MVVM패턴에 대해 많이 보게된다. 그 중 MVC패턴에 대해 간단히 살펴보자.
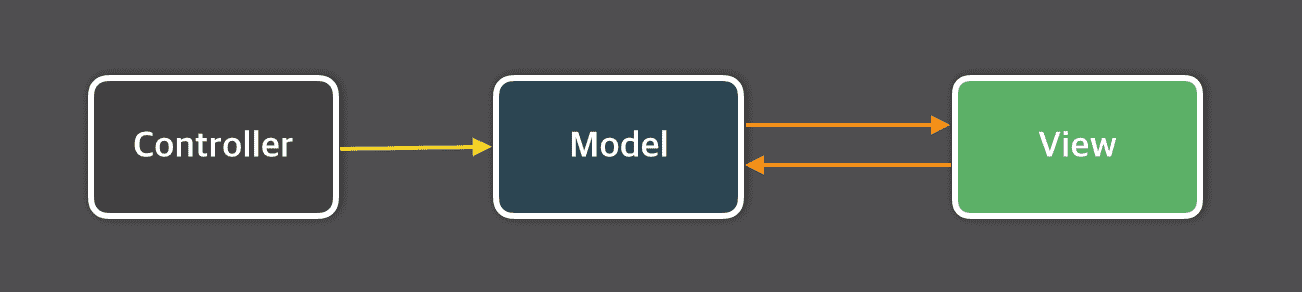
MVC패턴의 기본적인 Model, View, Controller의 구조이다.
Controller는 Model을 조회하거나 수정하는 등의 작업을 통해 View에 전달된다.
문제는 이러한 구조가 더 큰프로젝트에서 사용하다보면 다음과같은 상황이 발생한다.
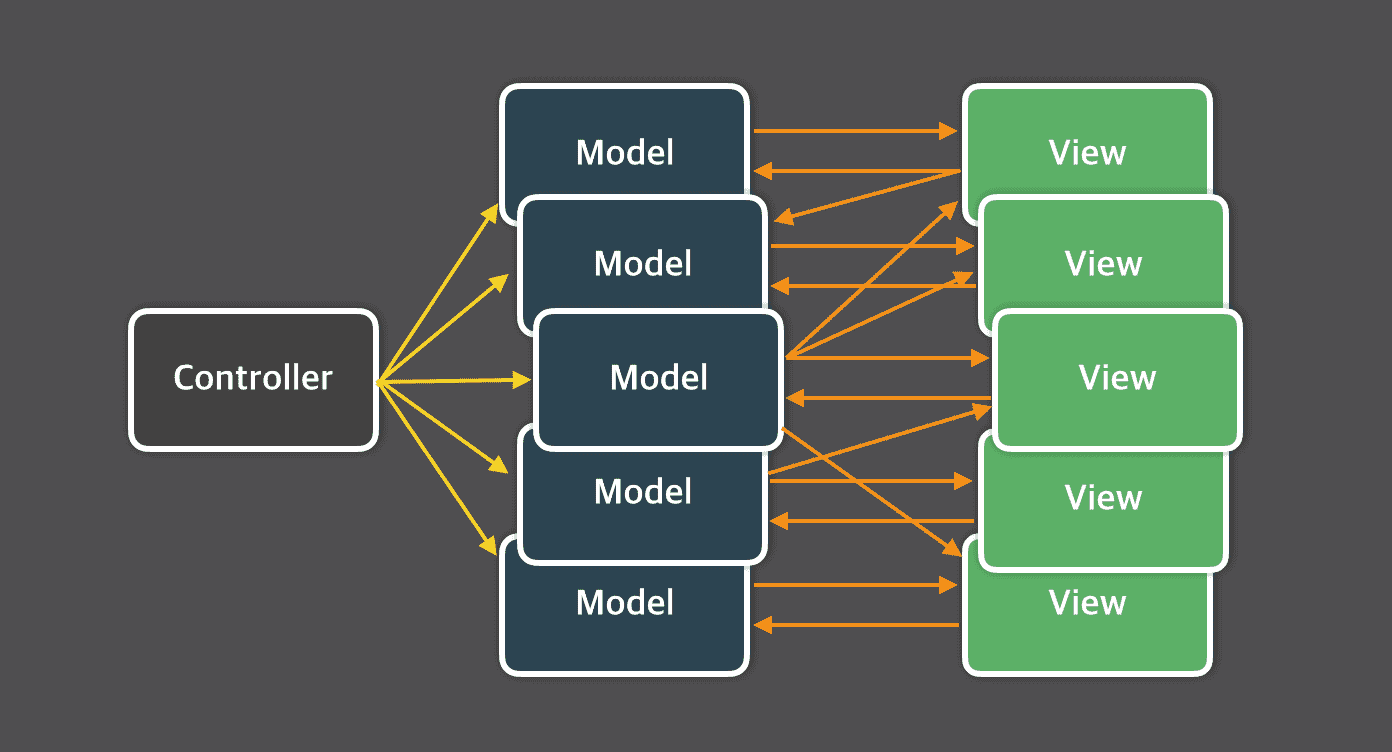
대규모 어플리케이션에서는 MVC패턴에서는 너무 복잡한 구조가 생겨나고 기능의 추가/수정이 어려워지기 시작한다.
이러한 문제를 해결하기위해 Flux라는 개념이 생겨났고 Flux는 다음과 같은 구조로 흐른다.

어떠한 Action이 발생하였을 때 Dispatcher가 Action을 관리하고 Dispatcher의 통제하에 Store에 있는 데이터를 조회/수정 등의 작업이 이루어진다. 그리고 View에 반영되는 구조이다.
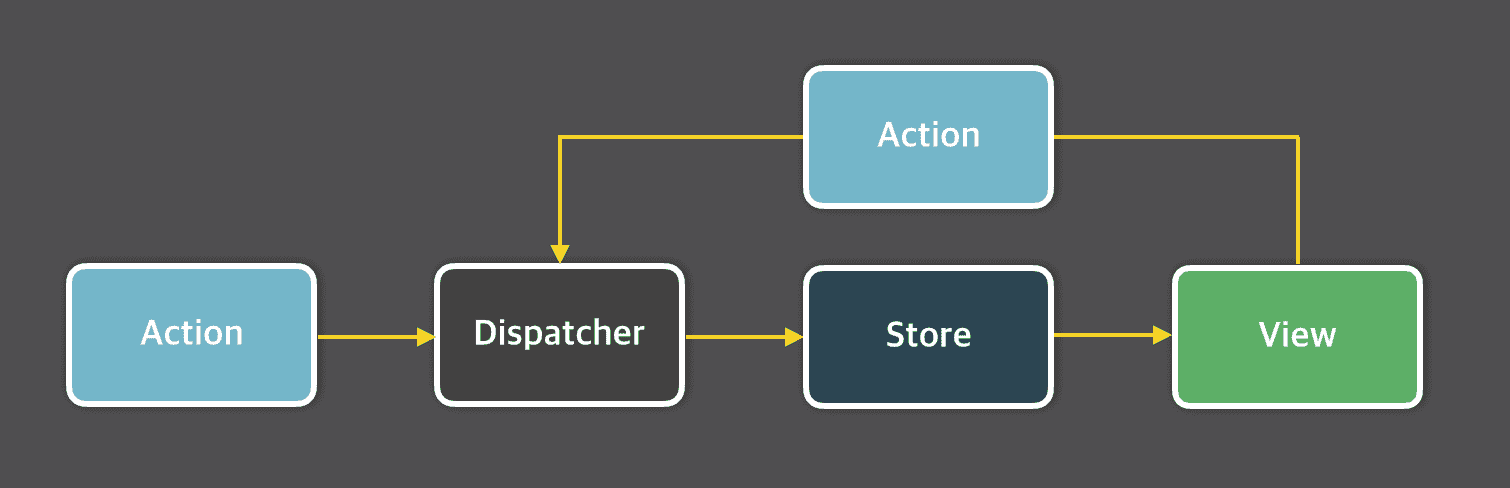
데이터의 흐름이 단방향이기때문에, View는 Dispatcher에 Action을 보낼 수 있고 역시 Dispatcher는 동일하게 Action을 Store의 수정을 통해 View에 반영된다.
Dispatcher는 요청된 Action에 대하여 중첩 실행되지 않으며, 하나의 Action이 실행중이라면 다음 호출된 Action은 이전 Action의 종료를 대기하게 된다.
Dispatcher는 전체 프로젝트 안에서 1개만 존재한다.
Redux
다시 리덕스로 돌아와서..
정리하자면 Redux는 위와같은 Flux구조를 좀 더 편하게 사용하기위한 라이브러리이다.
모든 데이터는 Store에 저장되고 컴포넌트끼리는 직접 교류하지 않고 Dispatcher를 통해 Action을 발생시킨다.
Component에서는 Store의 정보를 구독(Subscribe)하고있다가 데이터가 변동되었을 때 View를 리렌더링 해준다.
Redux의 세 가지 규칙
1. 단일 스토어
하나의 어플리케이션 안에는 하나의 스토어만 사용한다. 여러개를 사용하는것이 전혀 불가능한것은 아니지만, 상태관리의 복잡성이 증가하기 때문에 하나의 사용을 권장한다.
2. 읽기 전용 상태
Redux는 읽기 전용 상태이다. Hook에서 setState를 통해 state를 업데이트 할 때 객체나 배열의 업데이트를 하기 위해 spread연산자를 사용했었다. 이외같이 Redux에서도 데이터를 검사할 때 얕은검사를 하기 때문에 좋은 성능을 유지하기 위해서는 spread를 통해 새로운 객체를 생성해주어야 한다.
3. 리듀서는 순수한 함수
리듀서는 Action으로부터 변경된 상태를 받아 기존의 상태를 새로운 상태로 변경하는 일을 하는 함수이다.
변화를 일으키는 리듀서는 순수함수여야 한다.
- 리듀서는 파라메터 외의 값에 의존해서는 안된다.
- 이전 상태의 객체를 건드리지 않고 반드시 새로운 객체를 만들어서 반환해야 한다.
- 같은 파라미터로 호출된 리듀서는 언제나 똑같은 결과를 리턴해야 한다.
만약 Date함수를 이용해 현재시간을 가져오는 함수가 필요하다면 이러한 내용은 리듀어 함수 밖에서 처리해야 한다.
Redux 예제로 살펴보기
- React 프로젝트 생성하기
npx를 통해 react 프로젝트를 생성한다.
    $npx create-react-app react-redux-tutorial

    Installing packages. This might take a couple of minutes.
    Installing react, react-dom, and react-scripts...

    yarn add v1.15.2
    [1/4] 🔍  Resolving packages...
    [2/4] 🚚  Fetching packages...
    [3/4] 🔗  Linking dependencies...
    warning "react-scripts > @typescript-eslint/eslint-plugin > tsutils@3.17.1" has unmet peer dependency "typescript@>=2.8.0 || >= 3.2.0-dev || >= 3.3.0-dev || >= 3.4.0-dev || >= 3.5.0-dev || >= 3.6.0-dev || >= 3.6.0-beta || >= 3.7.0-dev || >= 3.7.0-beta".
    [4/4] 🔨  Building fresh packages...
    success Saved lockfile.
    success Saved 20 new dependencies.
...- redux 설치
$npm install redux react-redux필요한 설치는 모두 끝이났다.
- 카운터 컴포넌트
Counter.js
import React from 'react';

const Counter = ({ number, onIncrease, onDecrease }) => {
    return (
      <div>
          <h1>{ number }</h1>
          <div>
              <button onClick={onIncrease}>+1</button>
              <button onClick={onDecrease}>-1</button>
          </div>
      </div>
    );
};

export default Counter;
App.js
import React from 'react';
import './App.css';

import Counter from './components/Counter';

function App() {
  return (
    <div>
      <Counter number={0} />
    </div>
  );
}

export default App;
실행해보자.
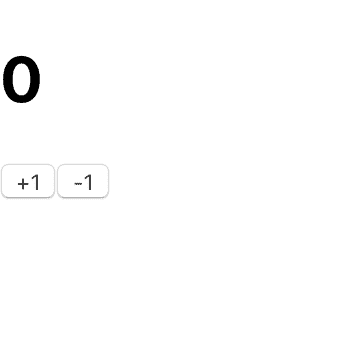
간단한 카운터 UI가 만들어졌다.
- Todos 컴포넌트
Todos.js
import React from 'react';

const TodoItem = ({ todo, onToggle, onRemove }) => {
    return (
      <div>
          <input type="checkbox" />
          <span>예제 텍스트</span>
          <button>삭제</button>
      </div>
    )
};

const Todos = ({
        input,
        todos,
        onChangeInput,
        onInsert,
        onToggle,
        onRemove,
    }) => {
        const onSubmit = e => {
            e.preventDefault();
        };
    return (
        <div>
            <form onSubmit={onSubmit}>
                <input />
                <button type="submit">등록</button>
            </form>
            <div>
                <TodoItem />
                <TodoItem />
                <TodoItem />
                <TodoItem />
                <TodoItem />
            </div>
        </div>
    )
};

export default Todos;
App.js
import React from 'react';
import './App.css';

import Counter from './components/Counter';
import Todos from './components/Todos';

function App() {
  return (
    <div>
      <Counter number={0} />
      <hr />
      <Todos />
    </div>
  );
}

export default App;
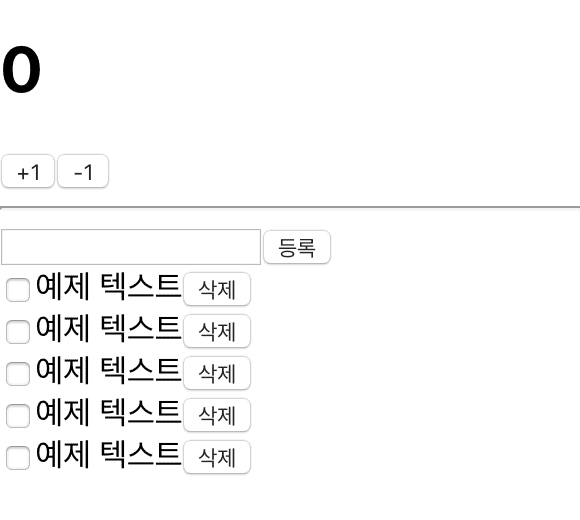
Todo 리스트 기능도 만들었다.
- Redux 코드 추가하기
counter 모듈 만들기
제일먼저 Action타입과 함수를 정의해주어야 한다.
module/counter.js를 생성해보자.
counter.js
// Action 타입 정의
const INCREASE = 'counter/INCREASE';
const DECREASE = 'counter/DECREASE';

// Action 함수 생성
export const increase = () => ({ type: INCREASE });
export const decrease = () => ({ type: DECREASE });
초기값 (default)설정 및 리듀서 함수 만들기
counter.js
// Action 타입 정의
const INCREASE = 'counter/INCREASE';
const DECREASE = 'counter/DECREASE';

// Action 함수 생성
export const increase = () => ({ type: INCREASE });
export const decrease = () => ({ type: DECREASE });

const initialState = {
    number: 0,
};

const counter = (state = initialState, action) => {
    switch(action.type) {
        case INCREASE:
            return {
                number: state.number + 1
            };
        case DECREASE:
            return {
                number: state.number - 1
            };
        default:
            return state;
    }
};

export default counter;
초기값 initialState와 리듀서함수 counter를 추가하였다.
todos 모듈 만들기
module/todos.js를 생성해보자.
todos.js
const CHANGE_INPUT = 'todos/CHANGE_INPUT';
const INSERT = 'todos/INSERT';
const TOGGLE = 'todos/TOGGLE';
const REMOVE = 'todos/REMOVE';

export const changeInput = input => ({
    type: CHANGE_INPUT,
    input,
});

let id = 3;
export const insert = text => ({
    type: INSERT,
    todo: {
        id: id++,
        text,
        done: false,
    }
});

export const toggle = id => ({
    type: TOGGLE,
    id,
});

export const remove = id => ({
    type: REMOVE,
        id,
});
초기값 및 리듀서 함수 정의
todos.js
const CHANGE_INPUT = 'todos/CHANGE_INPUT';
const INSERT = 'todos/INSERT';
const TOGGLE = 'todos/TOGGLE';
const REMOVE = 'todos/REMOVE';

export const changeInput = input => ({
    type: CHANGE_INPUT,
    input,
});

let id = 3;
export const insert = text => ({
    type: INSERT,
    todo: {
        id: id++,
        text,
        done: false,
    }
});

export const toggle = id => ({
    type: TOGGLE,
    id,
});

export const remove = id => ({
    type: REMOVE,
        id,
});

const initialState = {
    input: '',
    todos: [
        {
            id: 1,
            text: '리덕스 기초 배우기',
            done: false,
        },
        {
            id: 2,
            text: '리액트와 리덕스 배우기',
            done: false,
        },
    ]
};

const todos = (state = initialState, action) => {
    switch (action.type) {
        case CHANGE_INPUT:
            return {
                ...state,
                input: action.input,
            };
        case INSERT:
            return {
                ...state,
                todos: state.todos.concat(action.todo),
            };
        case TOGGLE:
            return {
                ...state,
                todos: state.todos.map(item => item.id === action.id ? { ...item, done: !item.done } : item),
            };
        case REMOVE:
            return {
                ...state,
                todos: state.todos.filter(item => item.id !== action.id),
            };
        default:
            return state;

    }
};

export todos;
루트 리듀서 만들기
지금까지 우리는 counter와 todos라는 2개의 리듀서르 만들었다. 제일 처음 리듀서를 소개할 때에는 프로젝트에 1개의 리듀서만 사용한다고 했었다. 이를 위해 2개의 리듀서를 하나로 합쳐주는 작업을 해보자.
redux에서 제공하는 combineReducers를 사용하면 쉽게 처리할 수 있다.
module/index.js를 생성하자.
index.js
import { combineReducers } from 'redux';
import counter from './counter';
import todos from './todos';

const rootReducer = combineReducers({
    counter,
    todos,
});

export default rootReducer;
스토어 만들기
src/index.js
index.js
import { createStore } from 'redux';
import rootReducer from './modules';

const store = createStore(rootReducer);
3줄을 적당한 위치에 추가해준다.
react Provider 추가
이제 컴포넌트에서 store를 사용할 수 있도록 추가해준다.
src/index.js
index.js
import { Provider } from 'react-redux';

ReactDOM.render(
    <Provider store={store}>
        <App />
    </Provider>, document.getElementById('root'));
최종 완성된 index.js
import React from 'react';
import ReactDOM from 'react-dom';
import './index.css';
import App from './App';
import * as serviceWorker from './serviceWorker';
import { Provider } from 'react-redux';
import { createStore } from 'redux';
import rootReducer from './modules';

const store = createStore(rootReducer);

ReactDOM.render(
    <Provider store={store}>
        <App />
    </Provider>, document.getElementById('root'));

// If you want your app to work offline and load faster, you can change
// unregister() to register() below. Note this comes with some pitfalls.
// Learn more about service workers: https://bit.ly/CRA-PWA
serviceWorker.unregister();
Container 생성하기
이제는 컴포넌트에서 리덕트 스토어에 접근하여 원하는 상태를 받아오고, 액션도 디스패치 해줄 차례이다. 리덕스 Store와 연동된 컴포넌트를 컨테이너 컴포넌트라고 한다.
container/CounterContainer.js 생성
CounterContainer.js
import React from 'react';
import { connect } from 'react-redux';
import Counter from '../components/Counter.js';
import { increase, decrease } from '../modules/counter';

const CounterContainer = ({ number, increase, decrease }) => {
    return <Counter number={number} onIncrease={increase} onDecrease={decrease} />
};

const mapStateToProps = state => ({
    number: state.counter.number
});

const mapDispatchToProps = dispatch => ({
    increase: () => {
        dispatch(increase());
    },
    decrease: () => {
        dispatch(decrease());
    }
});

export default connect(
    mapStateToProps,
    mapDispatchToProps
)(CounterContainer);
TodoContainer.js
import React from 'react';
import { connect } from 'react-redux';
import { changeInput, insert, toggle, remove  } from '../modules/todos';
import Todos from '../components/Todos';

const TodosContainer = ({
    input,
    todos,
    changeInput,
    insert,
    toggle,
    remove,
}) => {
    return (
      <Todos
          input={input}
          onInsert={insert}
          todos={todos}
          onChangeInput={changeInput}
          onToggle={toggle}
          onRemove={remove} />
    );
};

export default connect(
    ({ todos }) => ({
        input: todos.input,
        todos: todos.todos,
    }),
    {
        changeInput,
        insert,
        toggle,
        remove,
    }
) (TodosContainer);
그리고 App.js에서 Component에서 불러오던것을 Continer로 변경한다.
App.js
import React from 'react';
import './App.css';

import CounterContainer from './containers/CounterContainer';
import TodoContainer from './containers/TodoContainer';

function App() {
  return (
    <div>
      <CounterContainer />
      <hr />
      <TodoContainer />
    </div>
  );
}

export default App;
정상작동하는지 확인해보자.
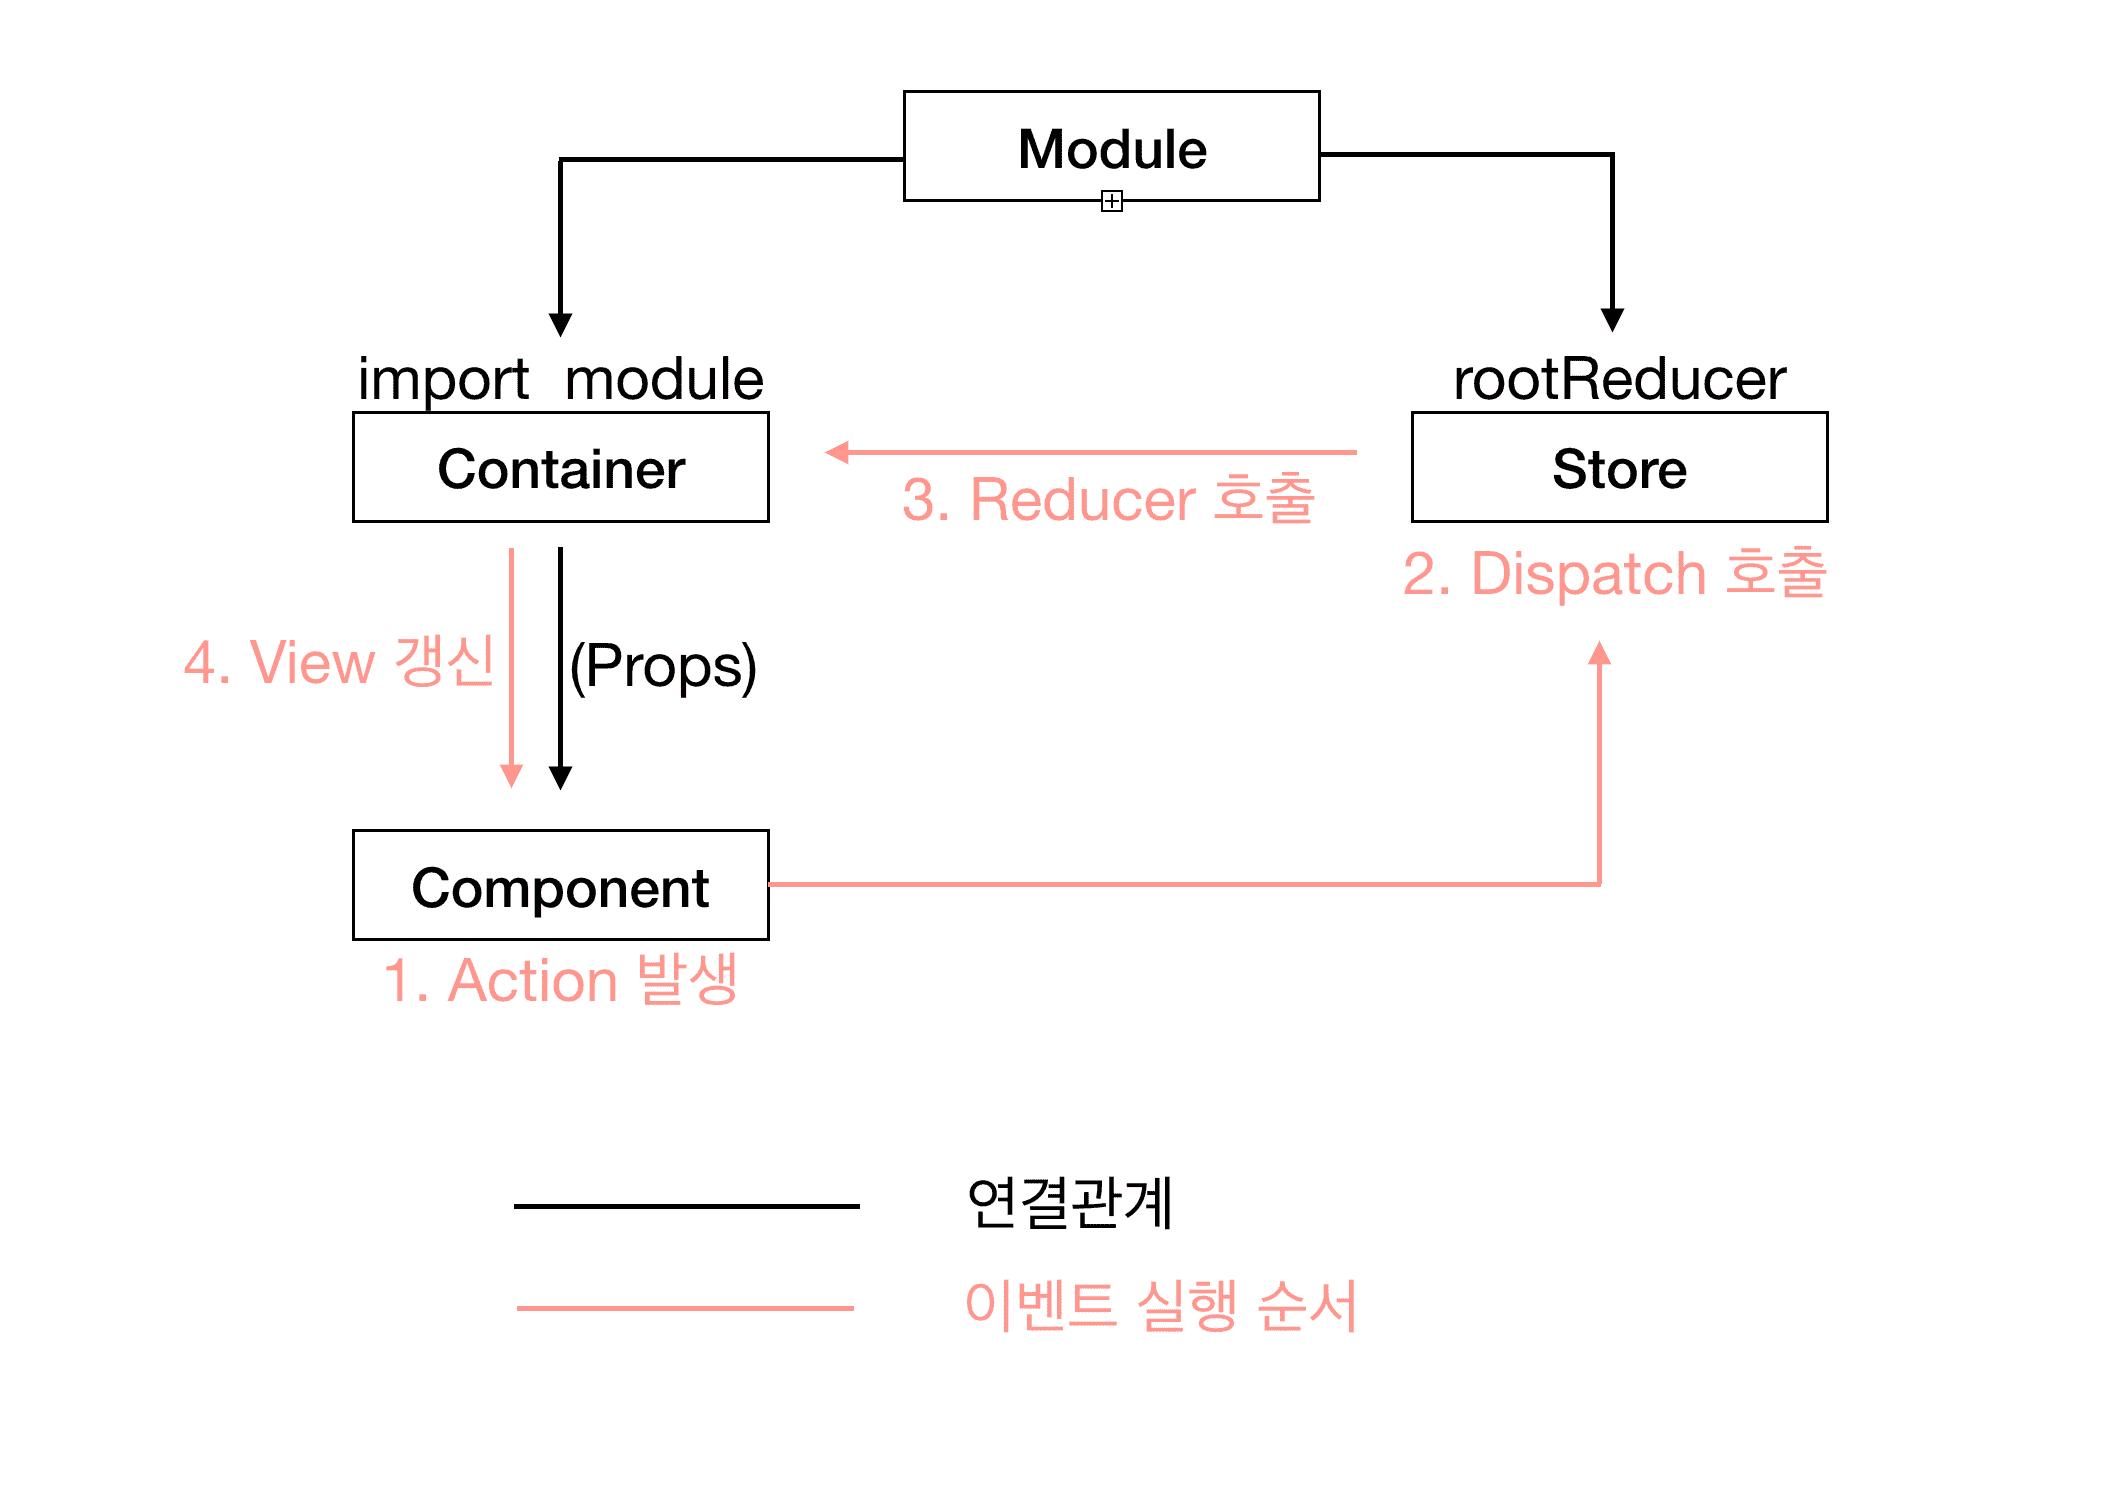
정리
지금까지 React Redux의 기본적인 구조에 대해 살펴보았다.
정리하자면 Module, Store, Container, Component 가 실행되는 동작 순서를 아래 그림과같이 정리해보았다.